Setup time: 5 Min
1. Create StatusCake Integration on All Quiet
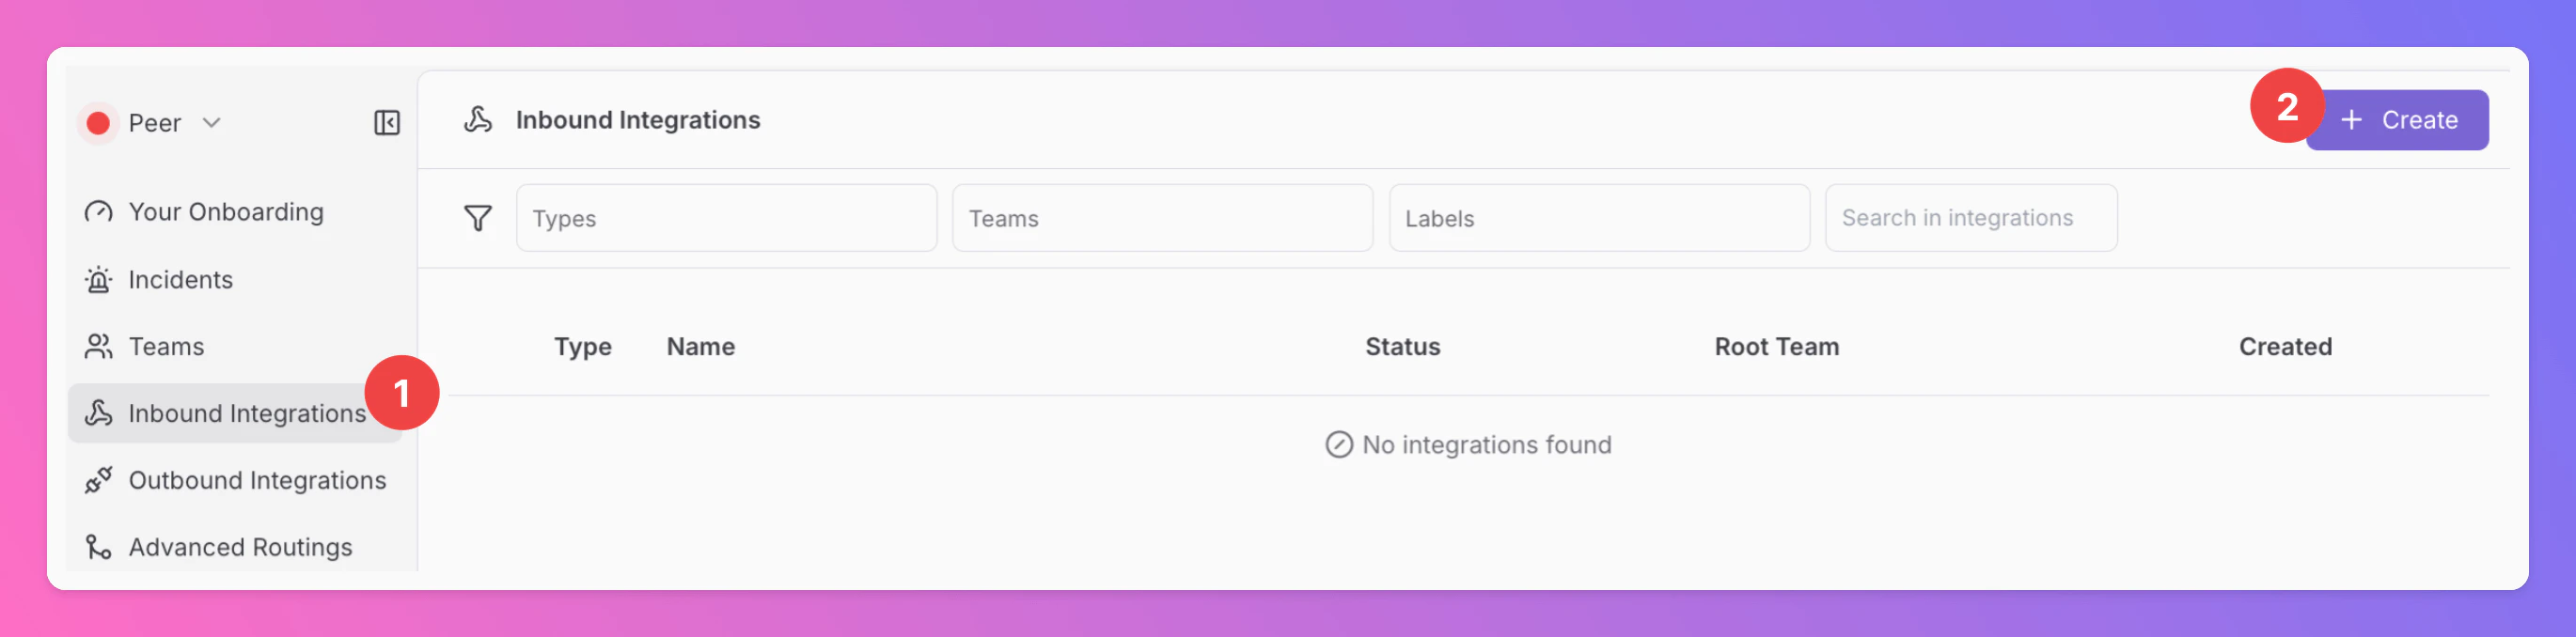
Create a StatusCake integration
- Click on the
Inbound Integrationstab. - Click on
+ Create.
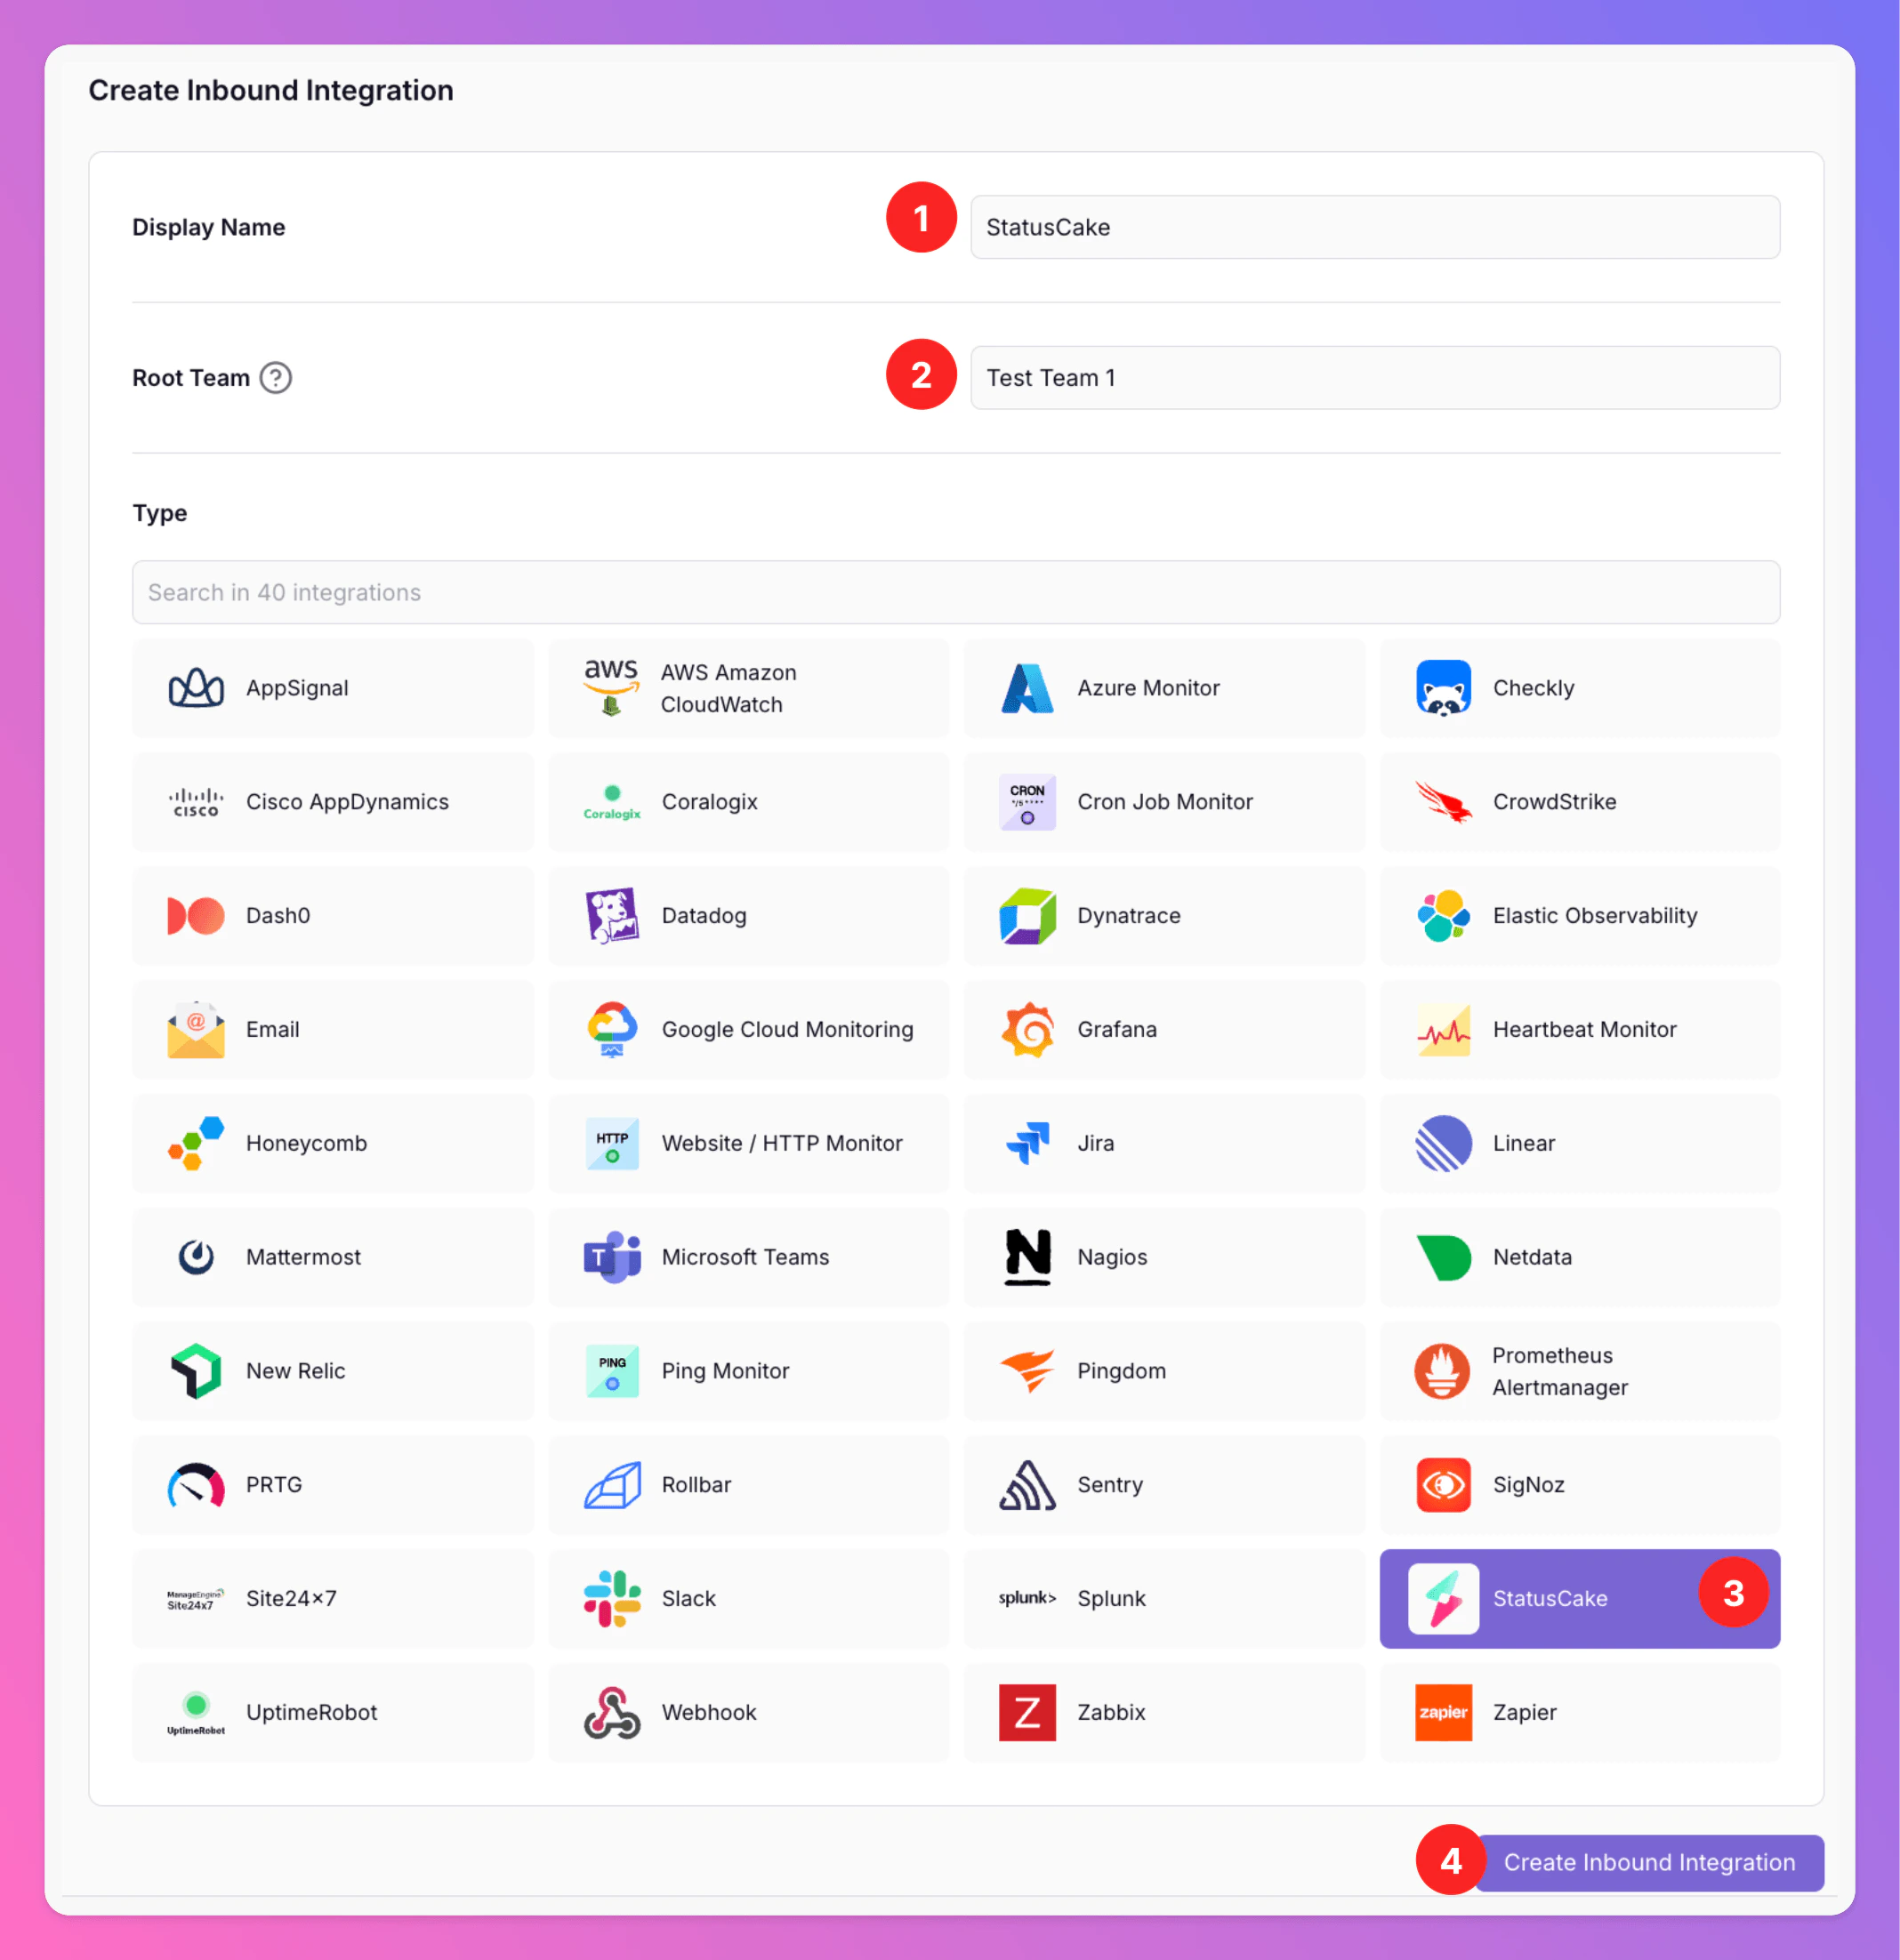
Select StatusCake as the integration’s type
- Enter a
Display Namefor your integration, e.g. “StatusCake”. - Select a
Team. - Select
StatusCakeas the integration’s type. - Click
Create Inbound Integration.
Get the All Quiet webhook URL
After creating the integration on All Quiet, you can view and copy the URL of the newly generated webhook. You will require this URL in step 2 when configuring the webhook integration on StatusCake.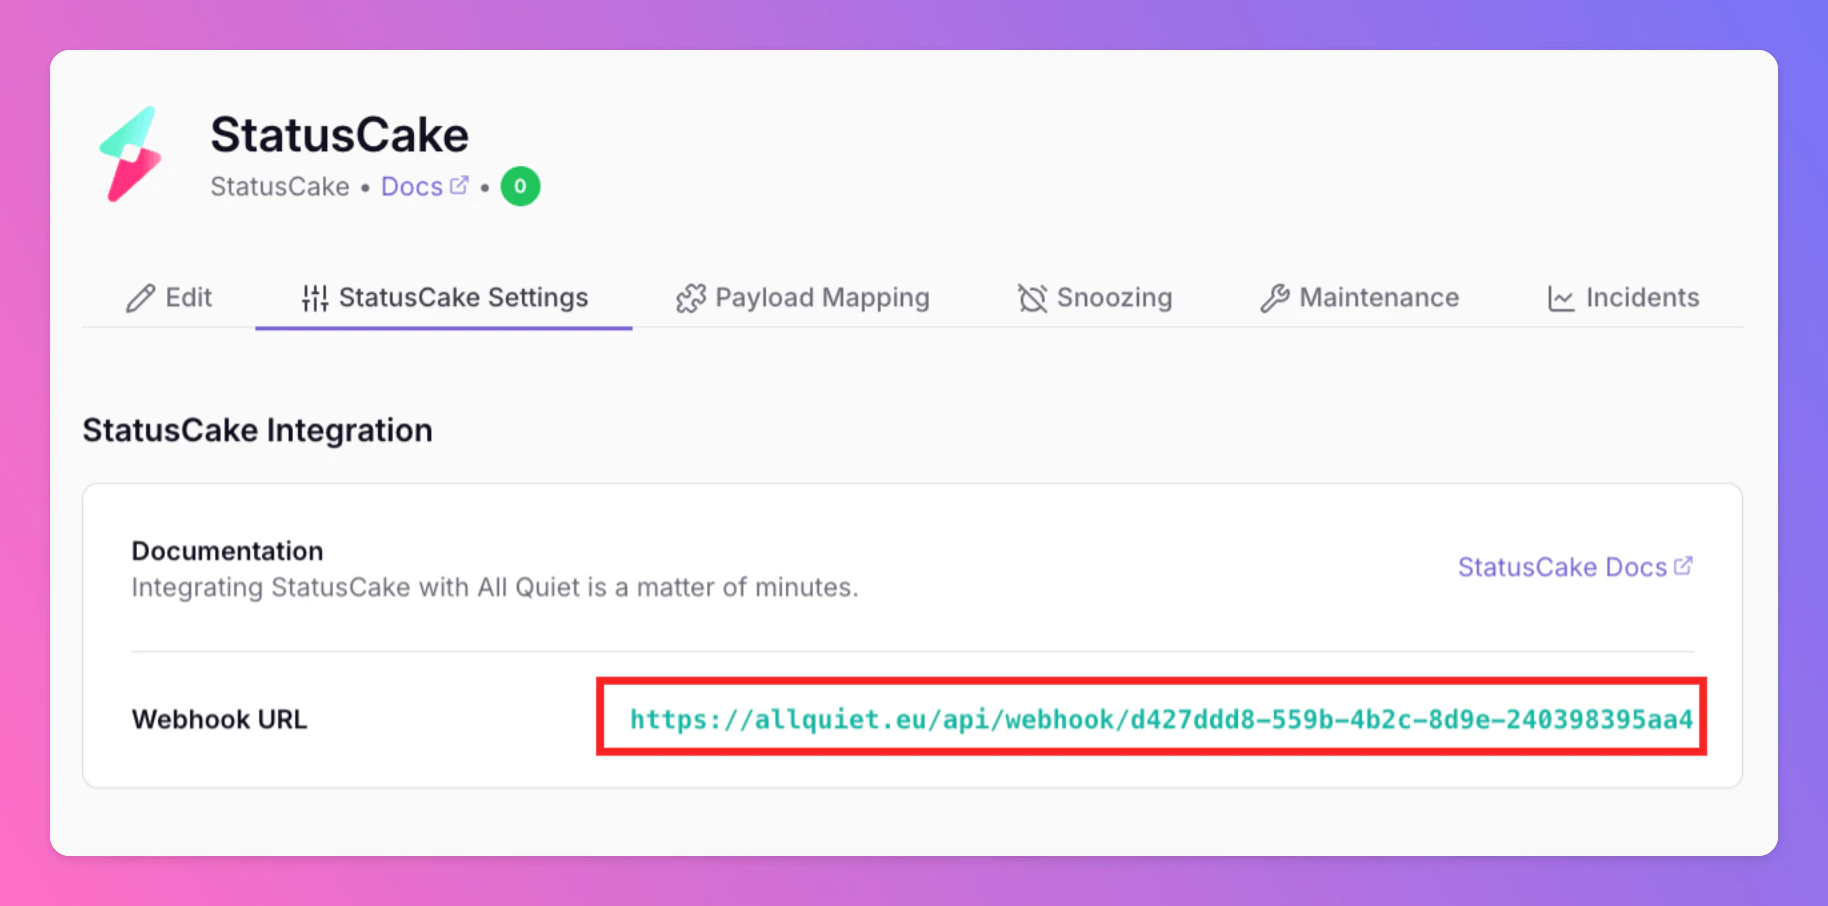
2. Configure StatusCake
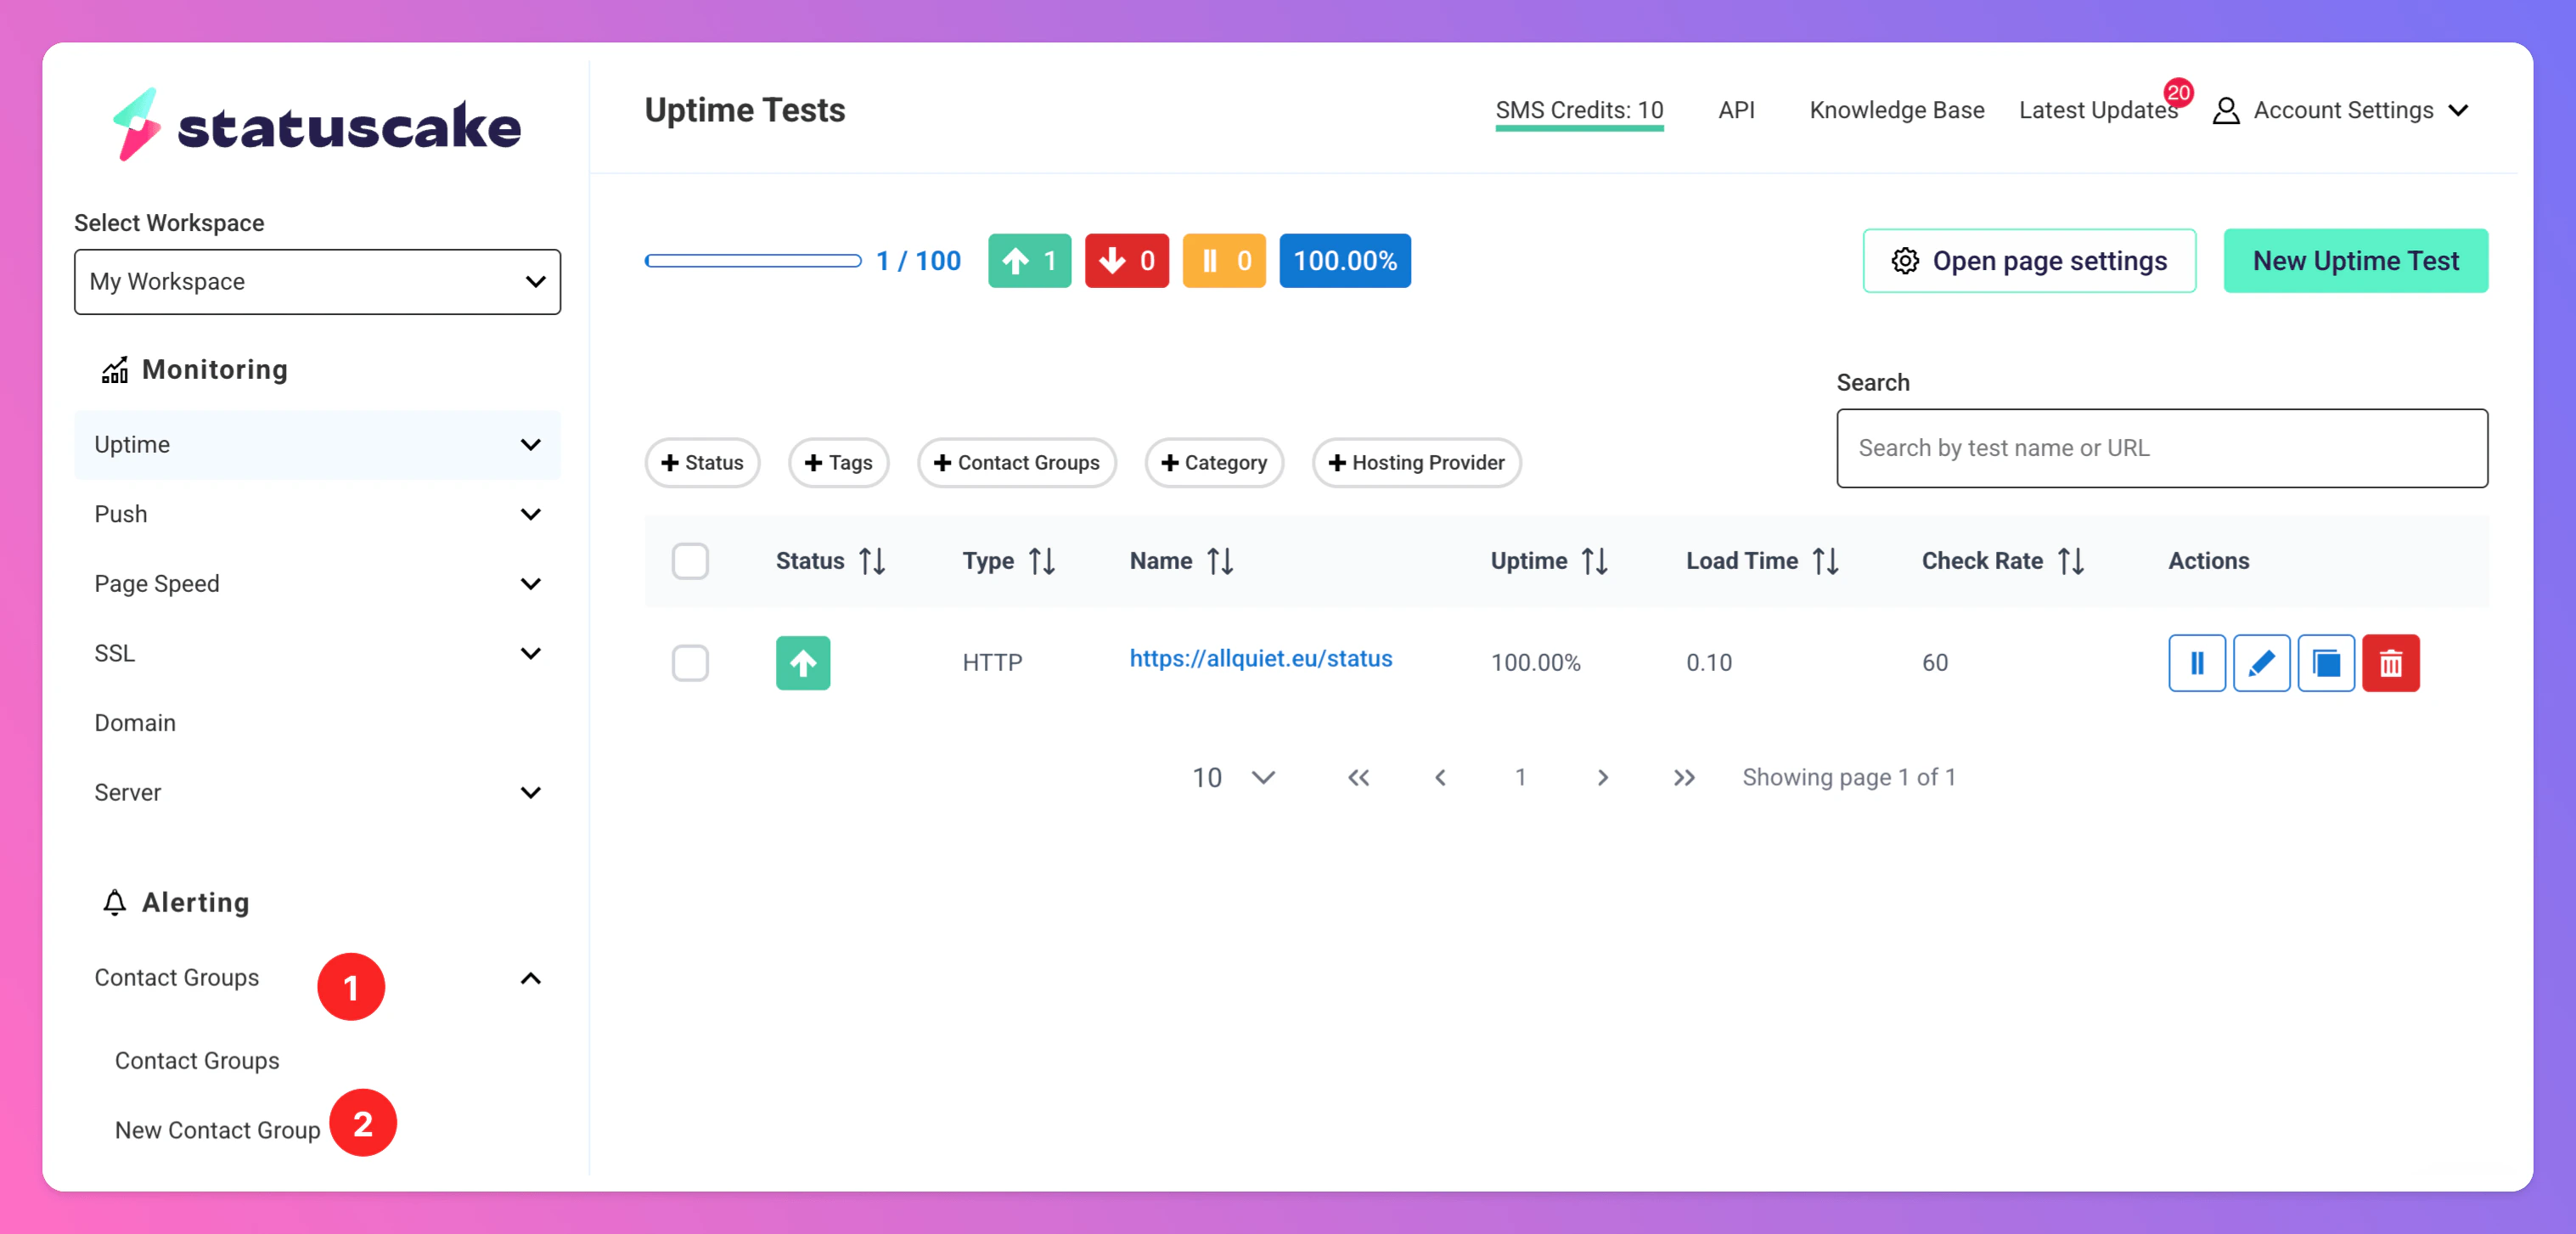
The following steps will be done on the StatusCake platform. First, log in to StatusCake with your account.Create New Contact Group
On StatusCake, we need to create a newContact Group to forward StatusCake alerts to your new integration in All Quiet
- In the sidebar select
Contact Groups. - Click
New Contact Group.
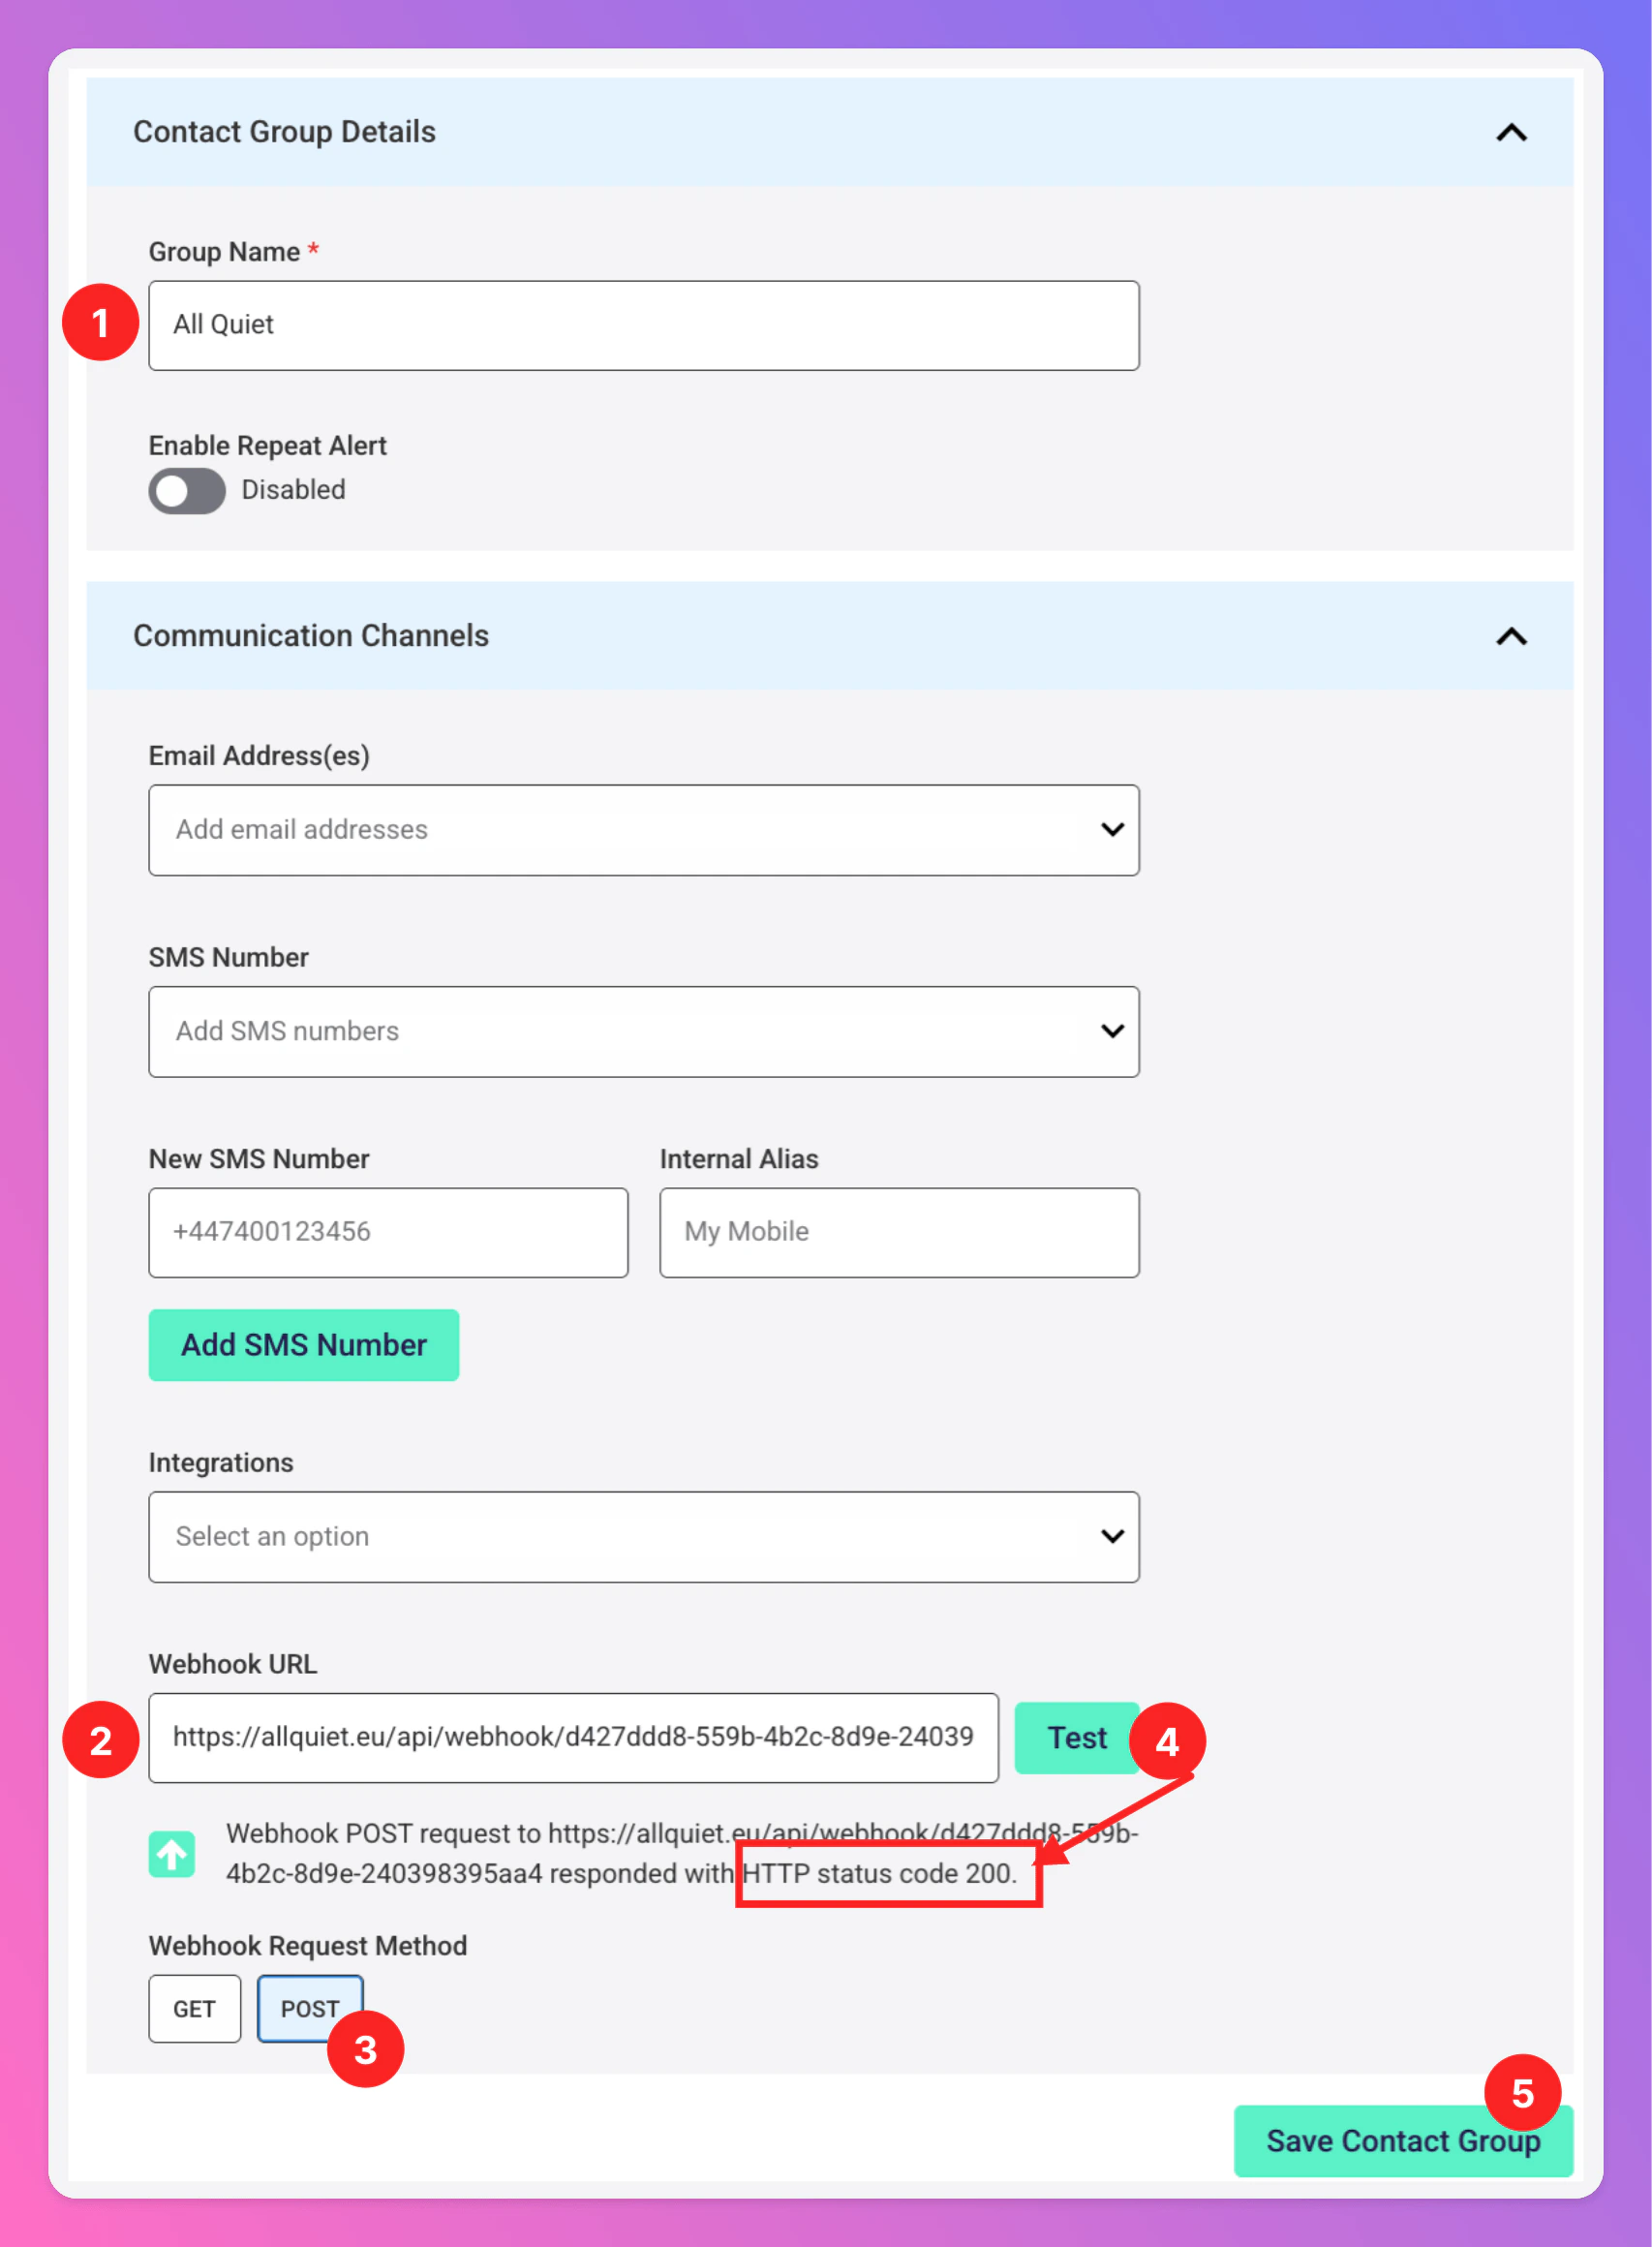
- Give your new
Contact Groupa decent name, like “All Quiet”. - In the
Webhook URLfield, enter the webhook URL that you generated in step one of the All Quiet integration setup. - As
Webhook Request Method, select “POST”. - Test your Wehook. If the test is succesful, you will see a 200 HTTP status code below. Also, you should see a
Resolvedincident in All Quiet, created from your newStatusCakeintegration. Save Contact Group.
Send Alerts to All Quiet
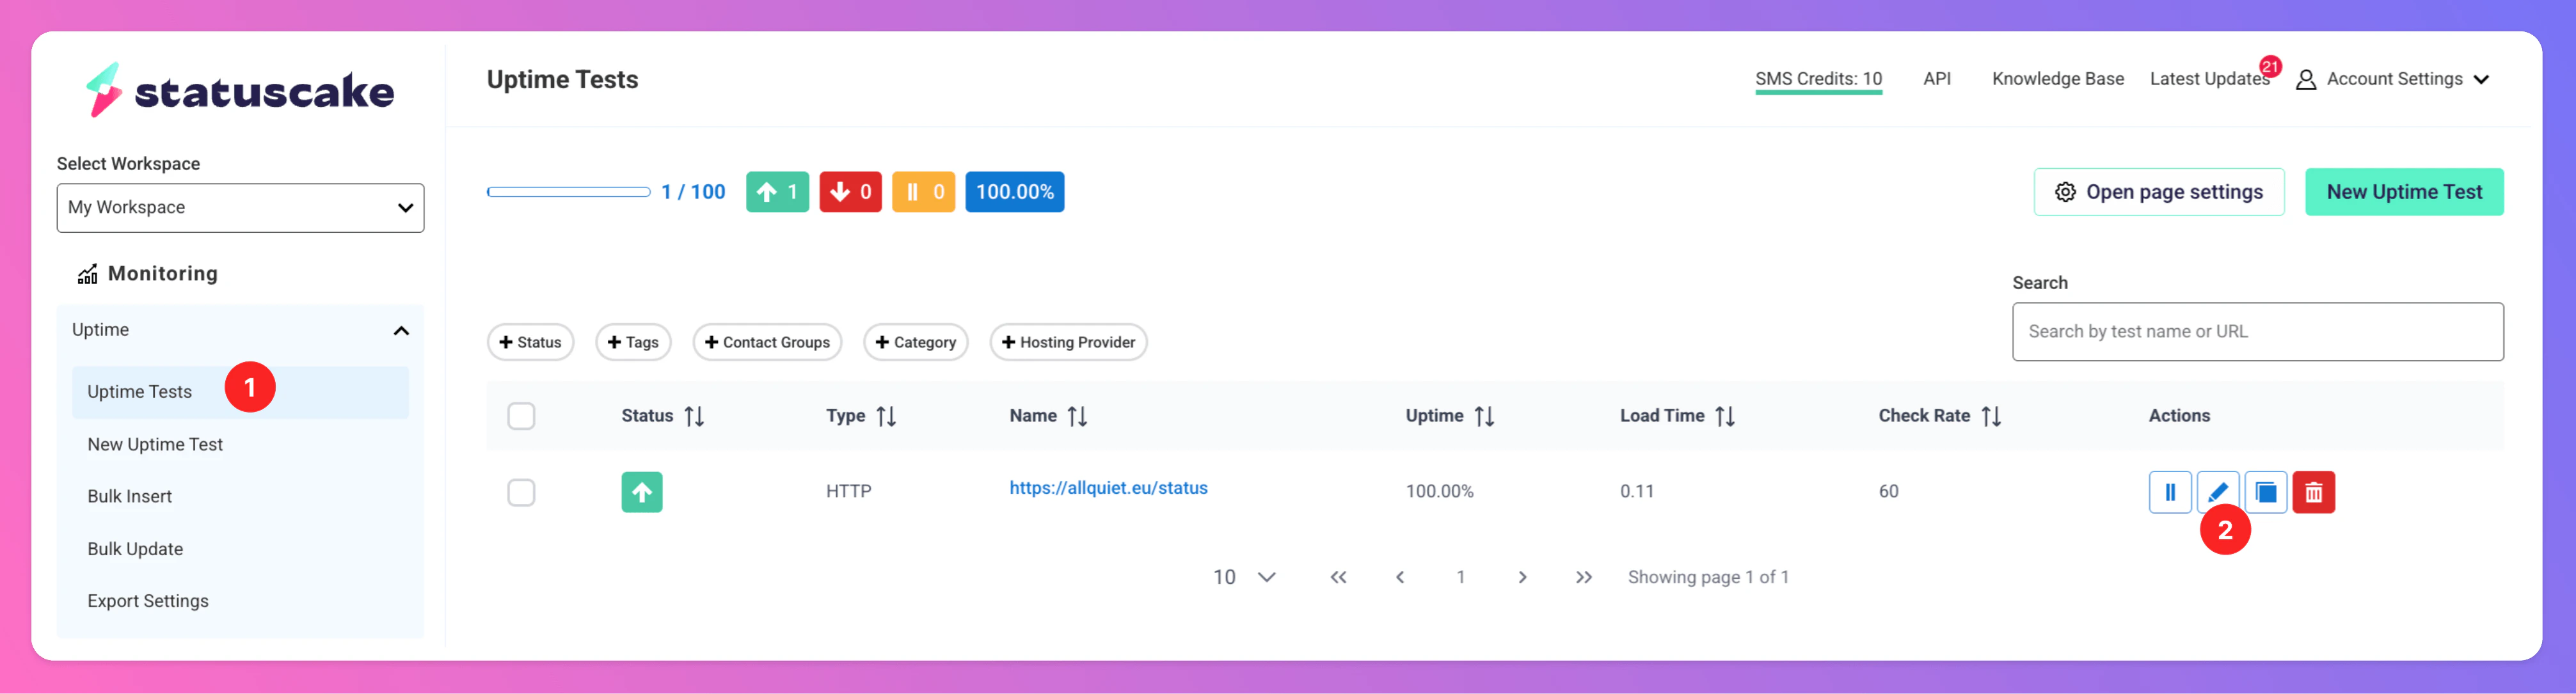
To send real alerts to All Quiet, add theContact Group you created in the last step to your StatusCake Uptime Tests.
- Click on
Uptime Tests - Select an Uptime Test and click on the
Edit“Action”.
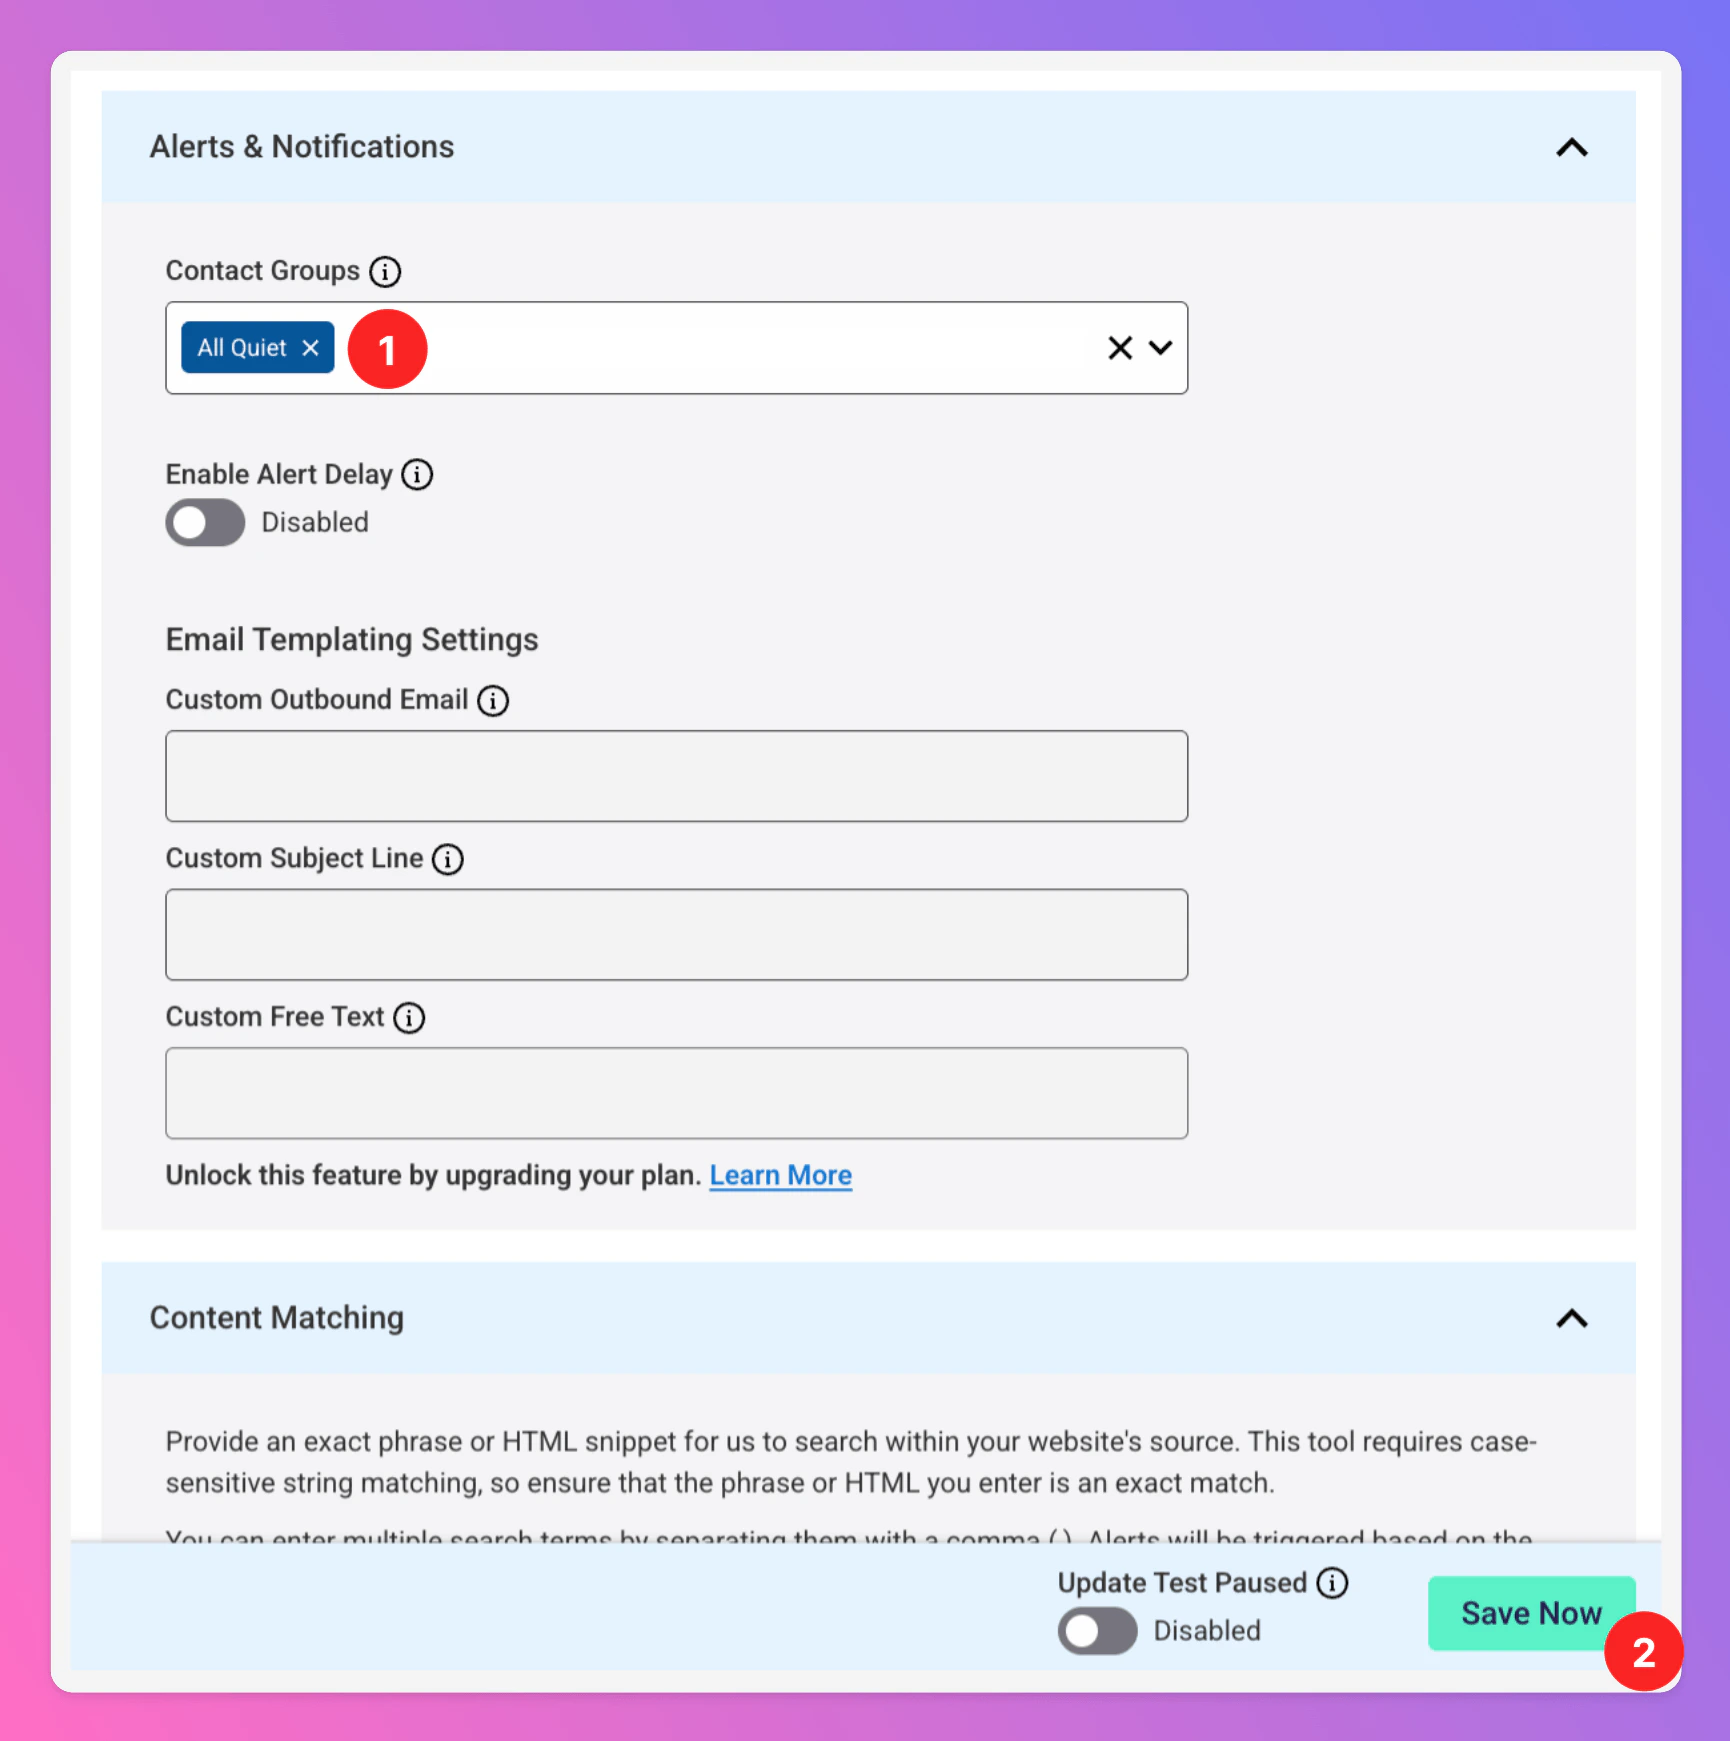
- In the
Alerts & Notificationsection, add your newly created Contact Group. - Click
Save Now.
Uptime Tests you want to forward to All Quiet.
StatusCake monitors are now integrated with All Quiet, enhancing your website’s monitoring and alert management capabilities through our easy-to-use platform and mobile apps.