Setup time: 2 Min
1. Create Pingdom Integration on All Quiet
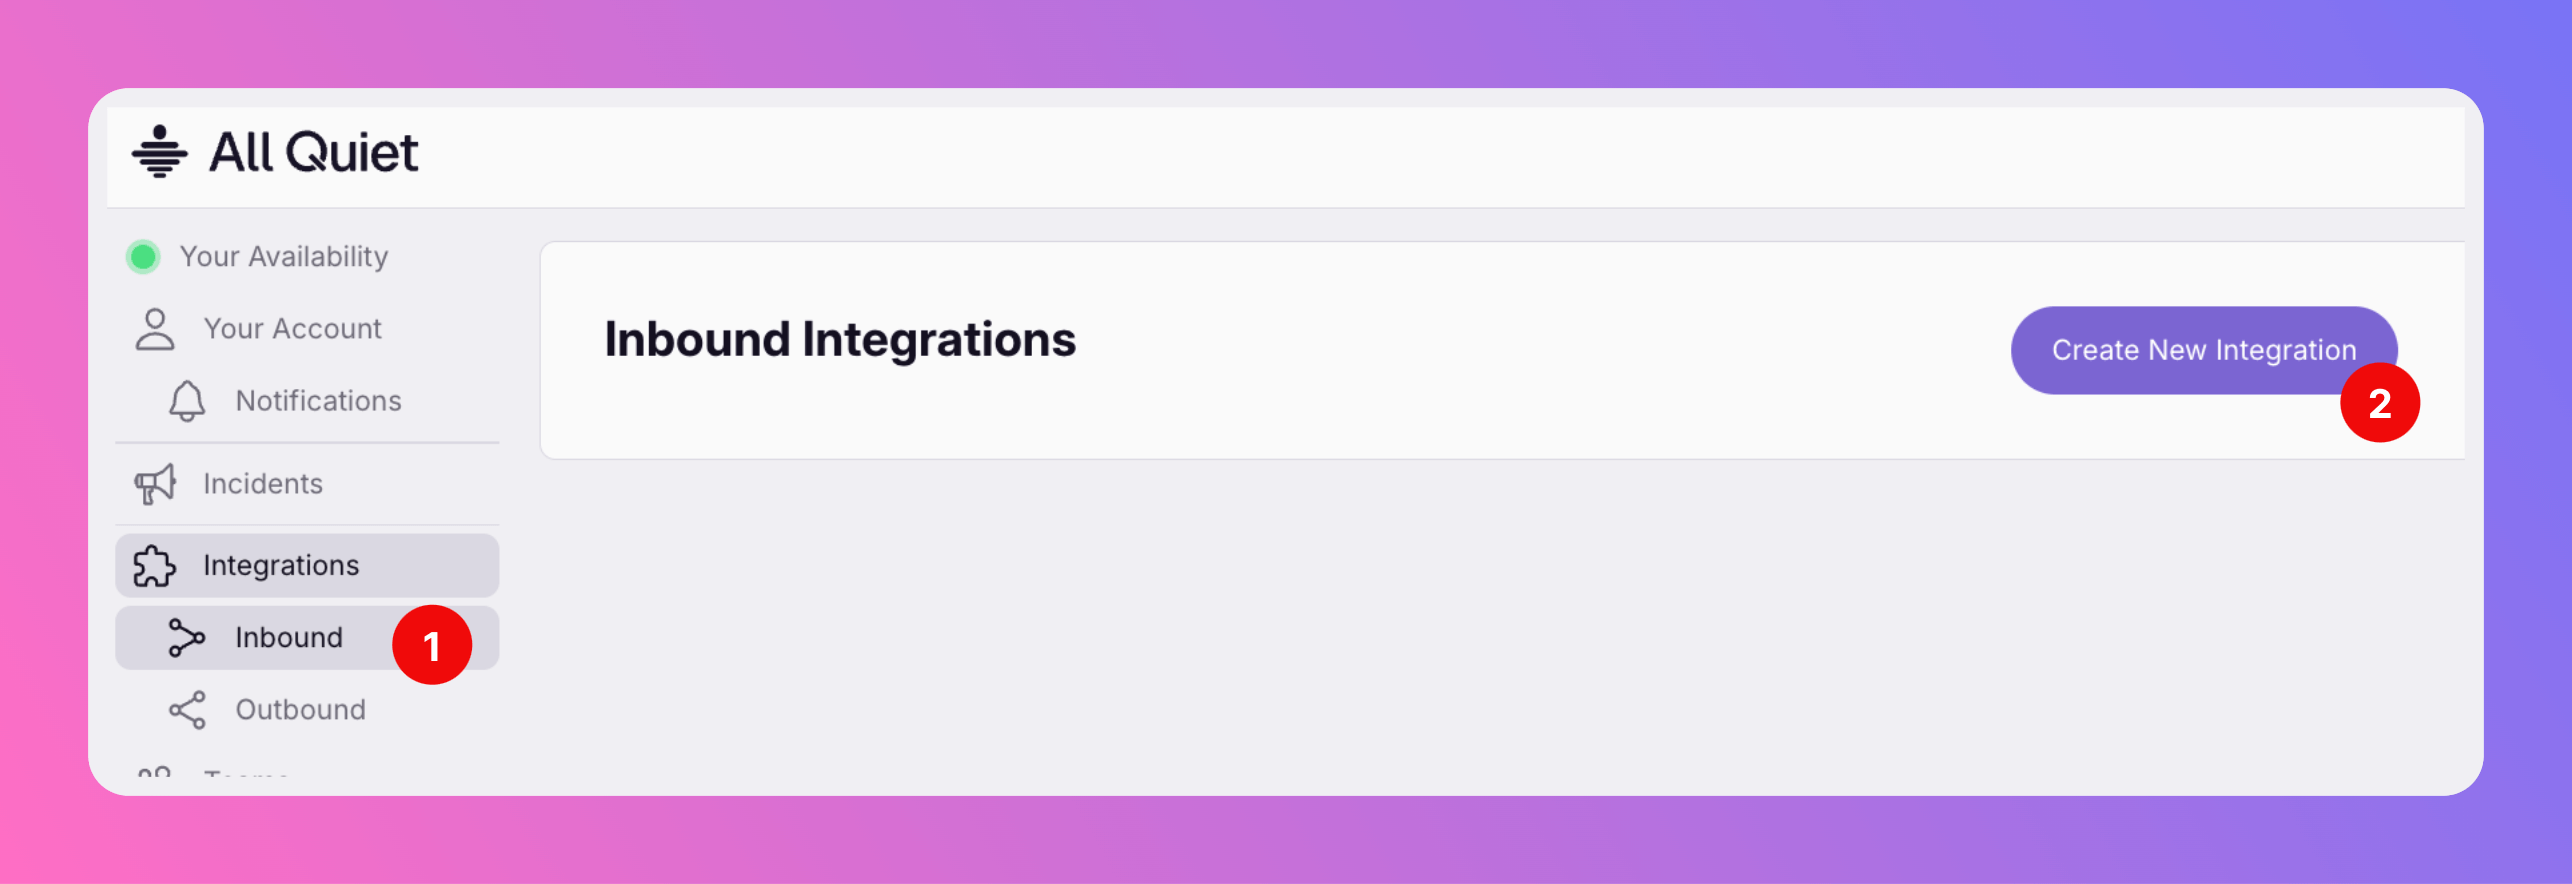
Sign in to your All Quiet account.Create Integration
- Click on the
Integrations > Inboundtab. - Click on
Create New Integration.
Select Pingdom as the integration’s type
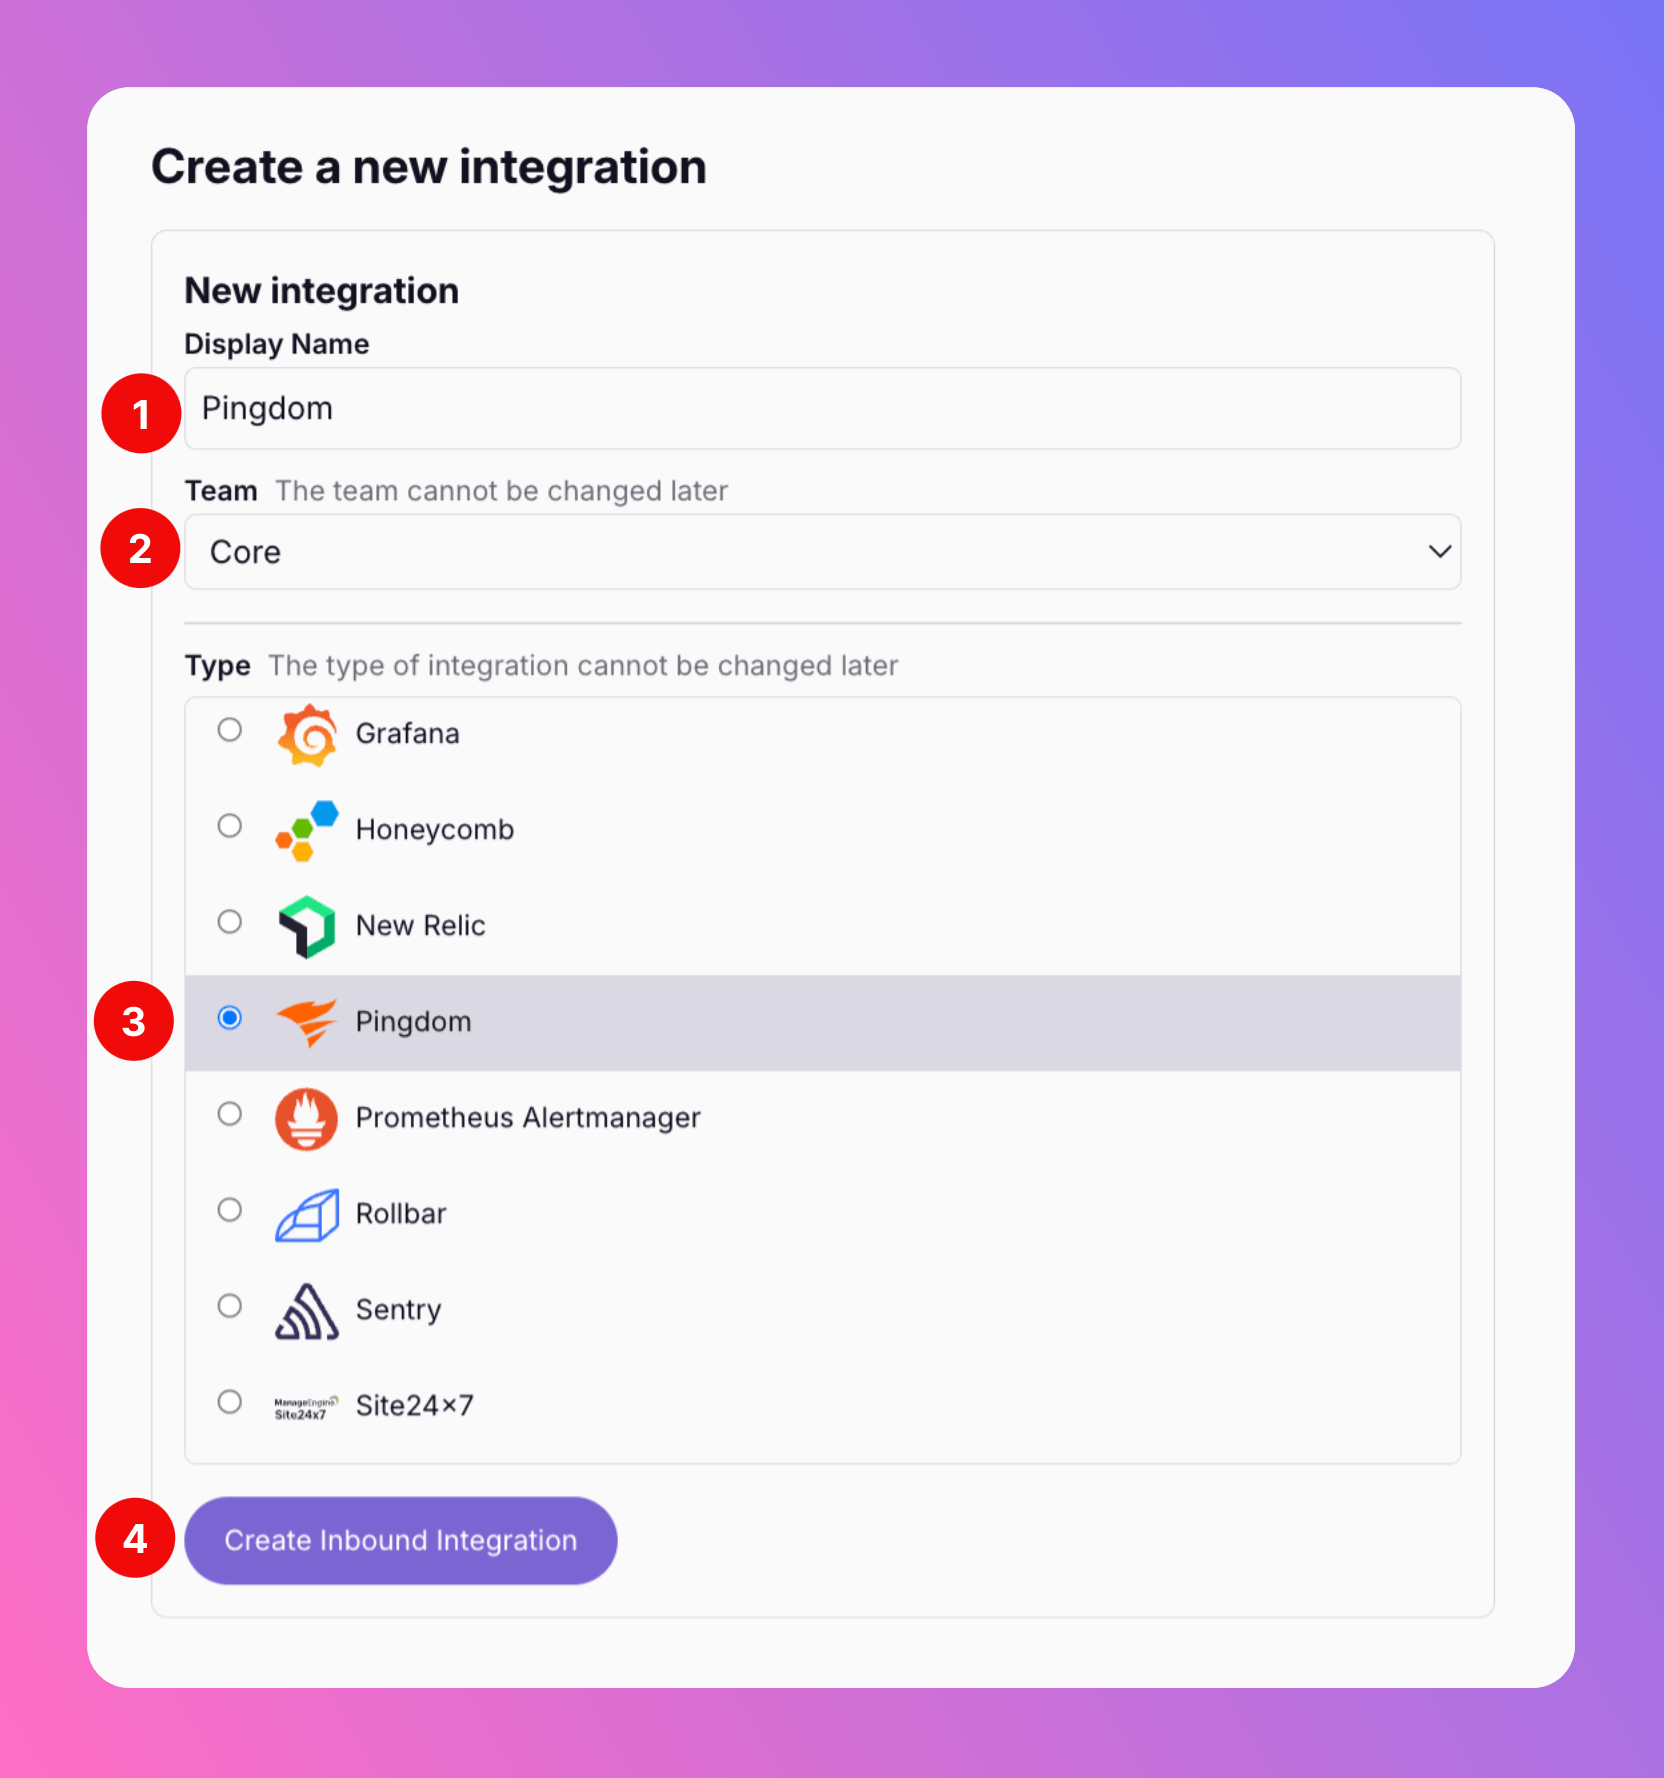
- Enter a display name for your integration, e.g.
Pingdom. - Select a team.
- Select
Pingdomas the integration’s type. - Click
Create inbound integration.
Copy Webhook URL
After creating the integration on All Quiet, you can view and copy the webhook URL. You will require this URL in step 2 when configuring the custom integration on Pingdom.
2. Configure a custom integration with Pingdom
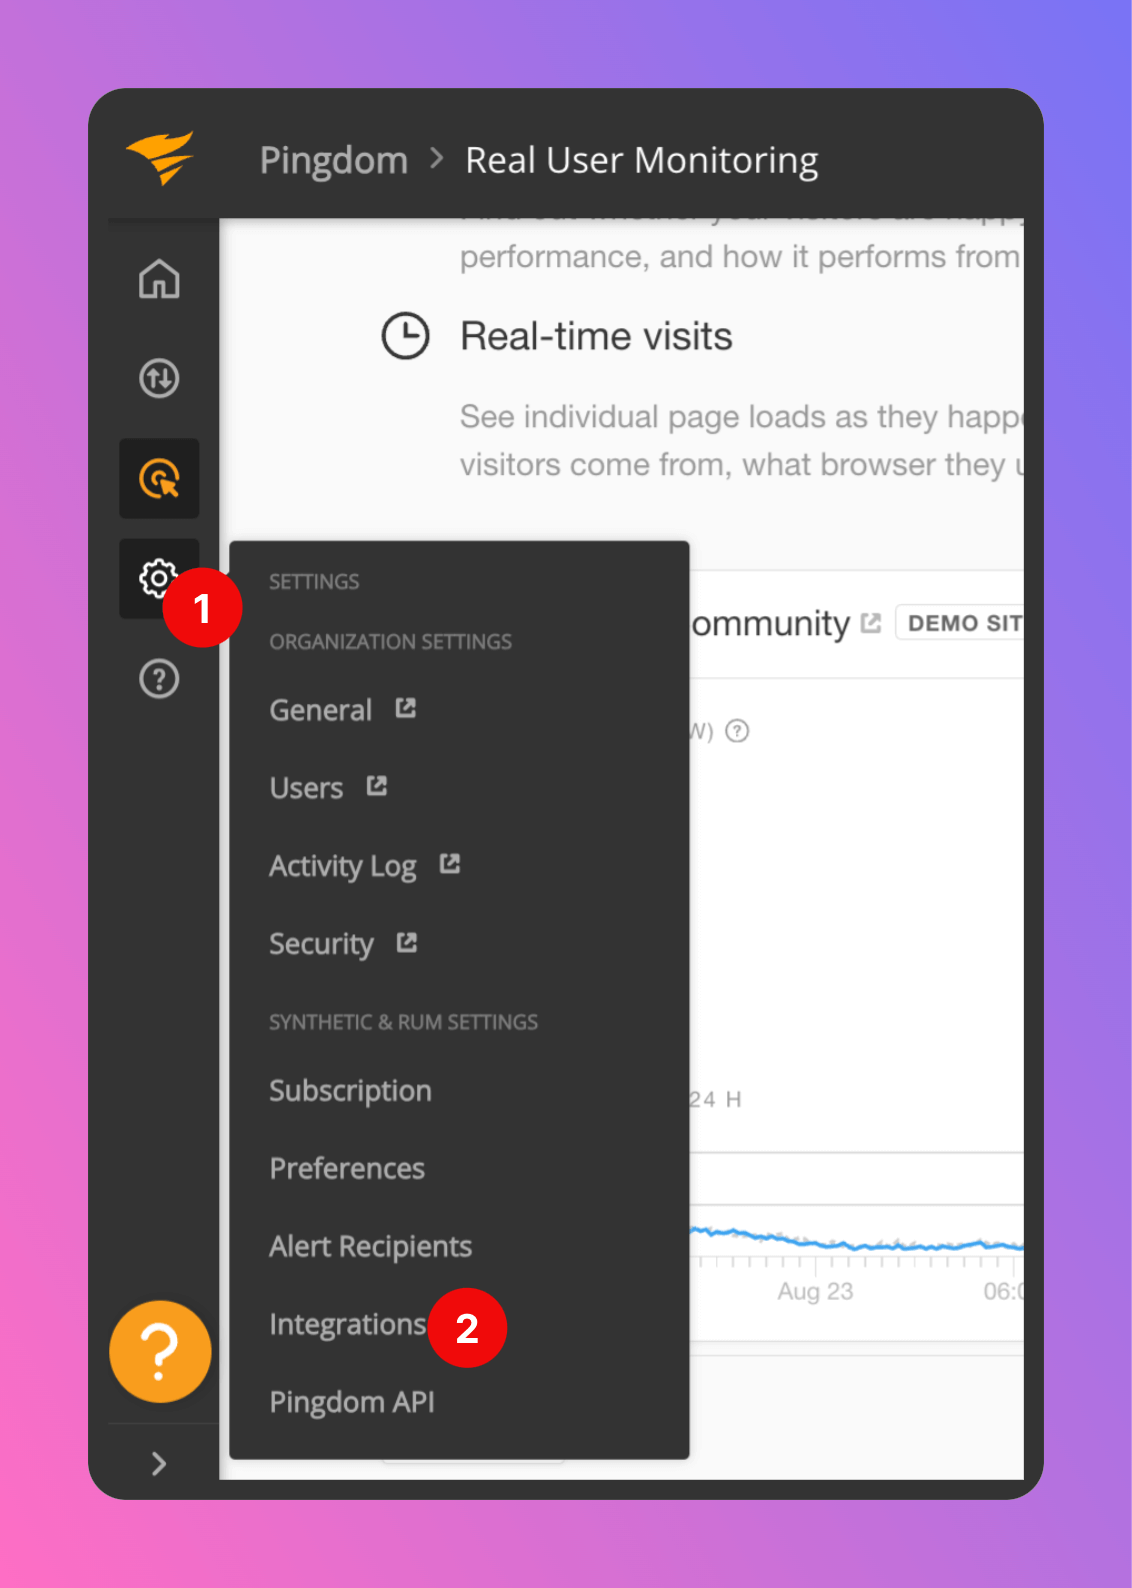
Once you’ve set up an integration of type “Pingdom” with All Quiet, the next crucial steps involve configuring your Pingdom account. This is essential for ensuring that your monitoring setup can effectively send incidents to the All Quiet webhook. In this part of the guide, we will walk you through the process of linking Pingdom with All Quiet via webhook. First, you need to sign in to your Pingdom Account.- Open
Settings - Select
Integrations
Add integration.

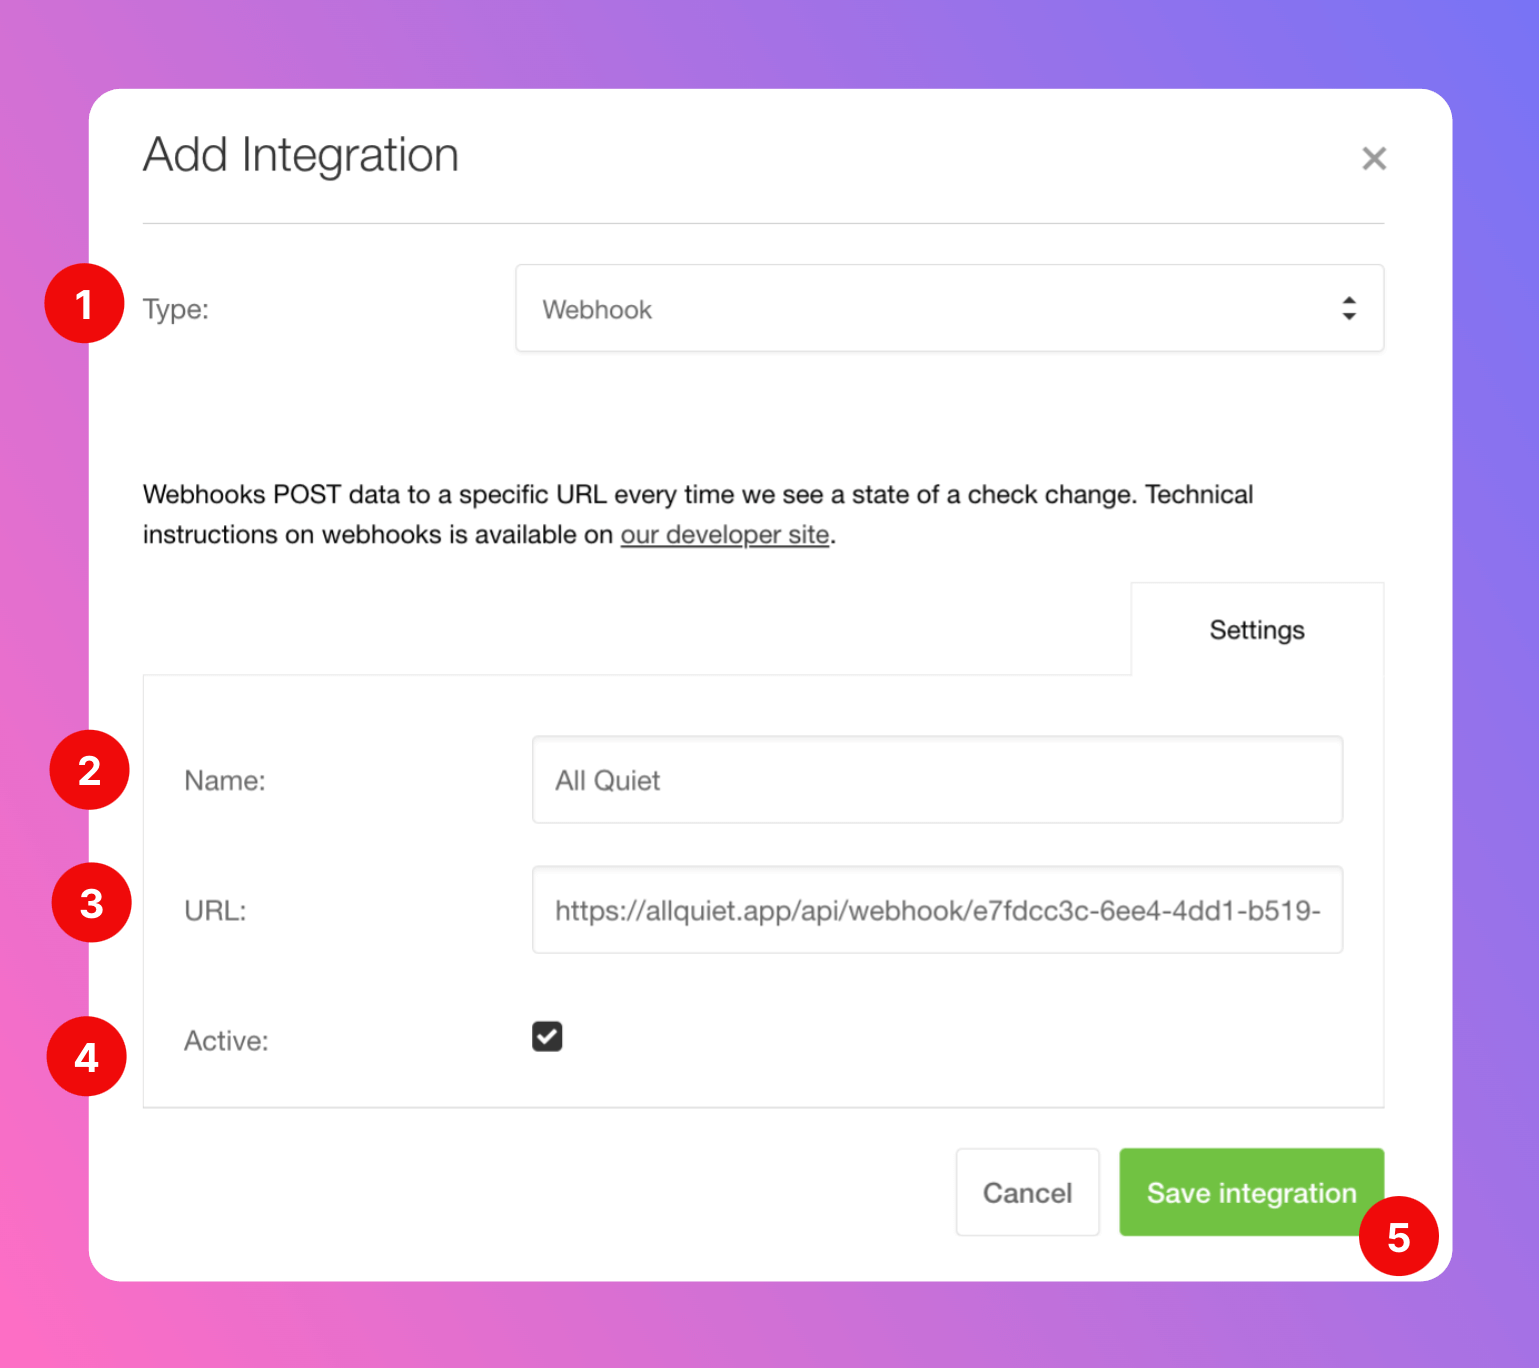
- As type, select
Webhook. - Select a name for the integration, e.g.
All Quiet. - As URL, paste in the All Quiet webhook URL you’ve obtained in step Get The All Quiet Webhook URL.
- Make sure the integration is
Active. Save integration
edit.
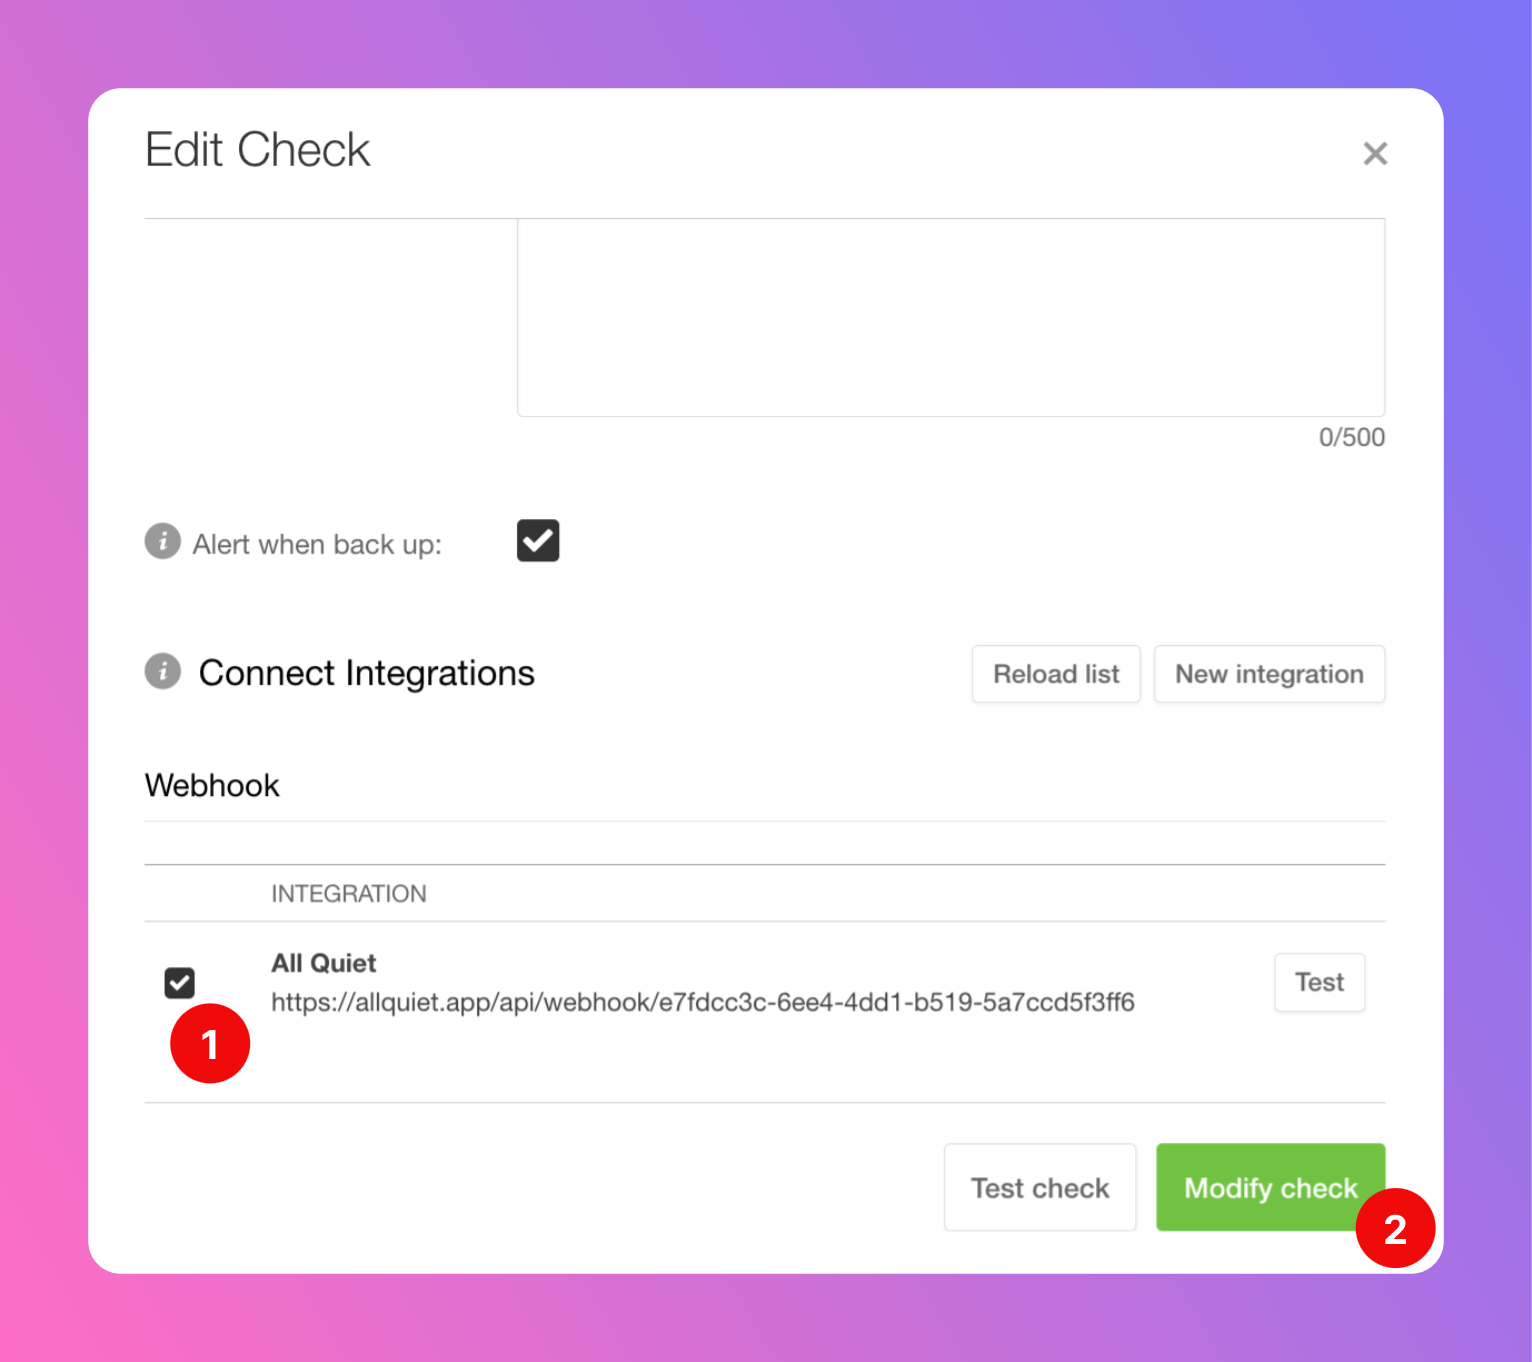
- Scroll down to
Connect Integrationsand activate the checkmark for the All Quiet integration you just created. - We recommend testing the integration. After clicking on
Test. You should receive a test incident in All Quiet. Make sure to save the changes by clickingModify check.
All Quiet will now create incidents based on your Pingdom monitoring.